
My youngest daughter Autumn started preschool this year and I have been super nervous about it. With my boys I was a preschool at home kind of mom and then even homeschooled them for kindergarten so sending her off at only three had a bit more jitters involved. The day before she would be starting I was a wreck and I needed to channel that nervous energy so decided to focus on making her something crochet to wear her first day.
I needed something quick and simple and a bow seemed like a good starting place but how to make it scream “SCHOOL!”? Played around a bit and came up with the ever classic and popular symbol of education, the number 2 pencil!
This pattern is quick and simple, very beginner friendly with only the smallest spot of seaming together and you finish with just simply winding your yarn around the middle. I’ve also included instructions to make the bow without the pencil design on the bottom and just regular square or triangle tails.
I hope you enjoy this pattern and I would LOVE to see your bows or even your school goers rocking them on their way to grow those little brains! Tag me on Instagram in your pictures with @woodland.stitchcraft!
Don’t miss the small back to school roundup I have included at the end of this blog post. All of the patterns are ADORABLE and with how fast these bows work up you’ll still have plenty of time to add them to your WIP list as you head into this school year.
Layered Bows
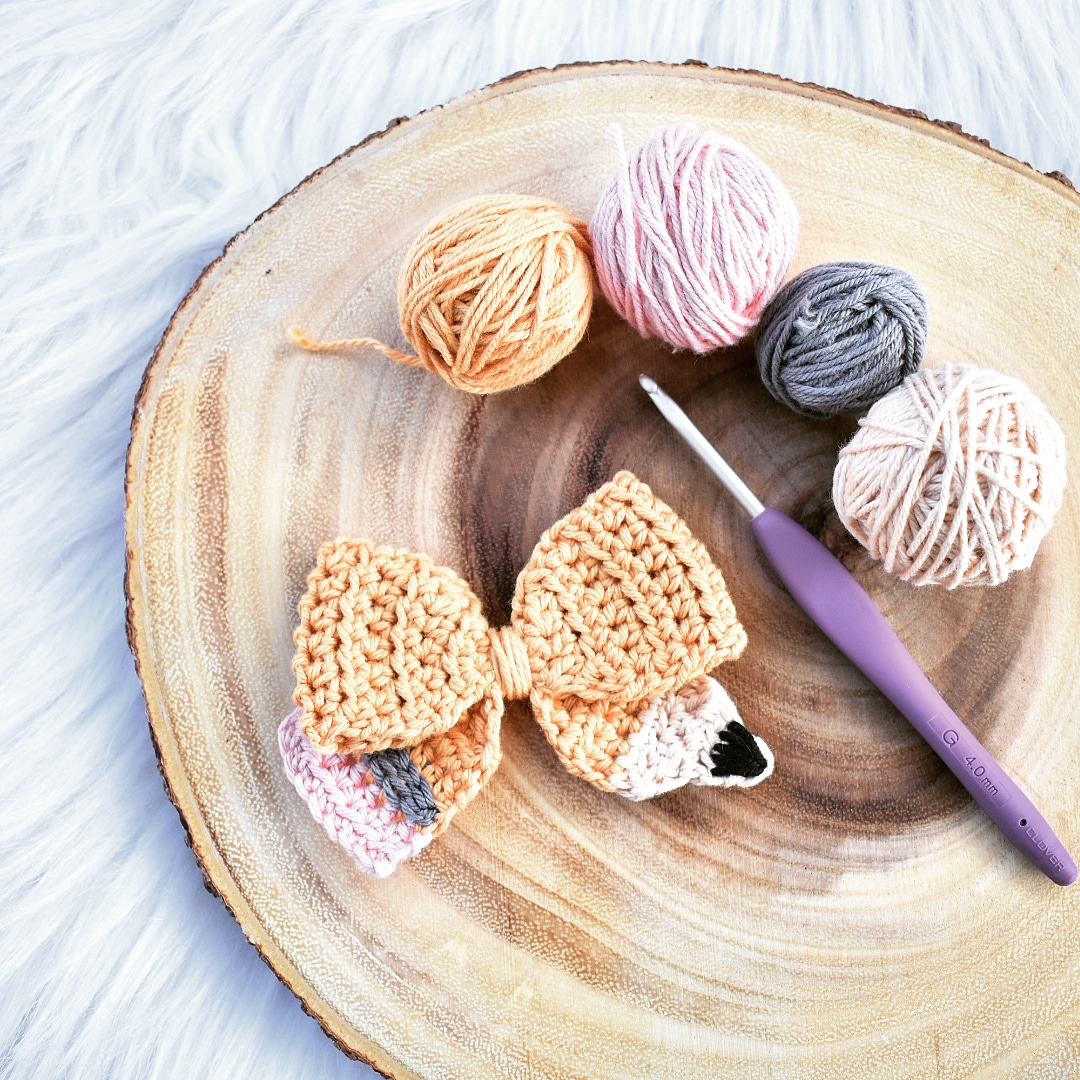
Materials:
Approximately 20 yards of DK/light weight yarn. I used Paintbox Yarns Cotton DK. (For the pencil you’ll need a mustard, pink, tan, black and grey.)
G/4 mm or size needed to obtain gauge
Scissors
Tapestry Needle
Measuring Tape
Duckbill clip or nylon headband to attach bow to for wearing
**This site contains affiliate links to products. We may receive a commission for purchases made through these links.
Size:
Finished bow is 4” wide and 3” tall.
Gauge:
hdc – 16 sts and 18 rows = 4”
Gauge is important to your project so your finished piece will be the size specified in the pattern and the materials specified in the pattern will be sufficient.
The hook size for the pattern is based on what I used, but gauge can vary from person to person and be affected by yarn. If it takes you fewer stitches and rows to make 4”, try using a smaller size hook; if more stitches and rows, try a larger size hook. The pattern also provides measurements to obtain for a specific size. Using a combination of matching gauge and measuring, as closely as possible, should get you close to the desired size.
Notes:
Beginning chains do not count as stitches, so DO NOT skip first stitch.
Bow is created in two seperate pieces by working in rows.
It‘s possible to manipulate the size of the bow by simply changing the yarn and hook sizes.
It’s possible to change length of tails by adding rows of 7 half double crochet to each side.
Stitches and Abbreviations:
ch(s) – chain(s)
st(s) – stitch(es)
sl st – slip stitch
hdc – half double crochet
Hdc2tog – half double crochet two together
Disclaimer: You may sell any items made from this pattern but do not sell, alter, rewrite or share this pattern. If you choose to sell your finished piece please give credit to my Instagram: @woodland.stitchcraft or blog. Please use your own pictures for your posts, ads, or listings.
Pencil Bow
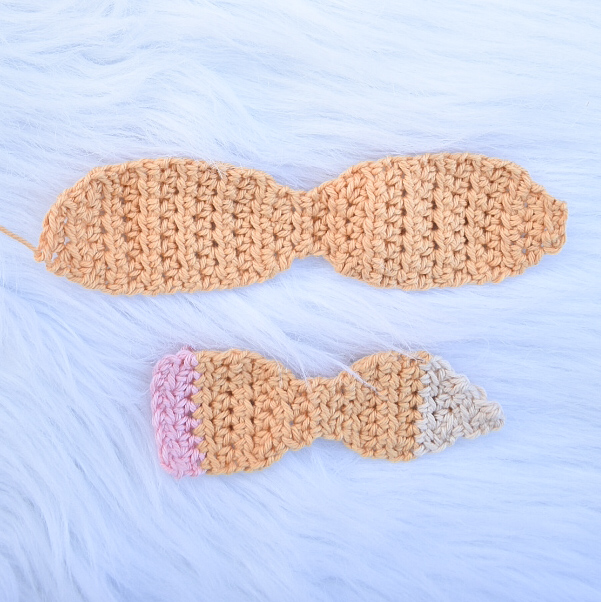
Top Half of Bow:
With mustard, ch 4.
Row 1: 2 hdc in 2nd ch from hook, hdc next, 2 hdc in last ch. (5)
Row 2: Ch 1, turn, 2 hdc in first st, hdc next 3, 2 hdc in last st. (7)
Row 3-10: Ch 1, turn, hdc in each st across. (7)
Row 11: Ch 1, turn, hdc2tog over first 2 sts, hdc next 3, hdc2tog over last 2 sts. (5)
Row 12: Ch 1, turn, hdc2tog over first 2 sts, hdc next, hdc2tog over last 2 sts. (3)
Row 13: Ch 1, turn, hdc each st across. (3)
Row 14: Ch 1, turn, 2 hdc in first st, hdc next, 2 hdc in last st. (5)
Row 15: Ch 1, turn, 2 hdc in first st, hdc next 3, 2 hdc in last st. (7)
Row 16-23: Ch 1, turn, hdc in each st across. (7)
Row 24: Ch 1, turn, hdc2tog over first 2 sts, hdc next 3, hdc2tog over last 2 sts. (5)
Row 25: Ch 1, turn, hdc2tog over first 2 sts, hdc next, hdc2tog over last 2 sts. (3)
Fasten off, leaving a long tail for sewing and wrapping the middle.
Bottom Half:
With pink, ch 8.
Row 1: Hdc in 2nd ch from hook and each ch across. (7)
Row 2: Ch 1, turn, hdc each st across. (7)
Switch to mustard,
Row 3-5: Ch 1, turn, hdc each st across. (7)
Row 6: Ch 1, turn, hdc2tog over first 2 sts, hdc next 3, hdc2tog over last 2 sts. (5)
Row 7: Ch 1, turn, hdc2tog over first 2 sts, hdc next, hdc2tog over last 2 sts. (3)
Row 8: Ch 1, turn, hdc in each st across. (3)
Row 9: Ch 1, turn, 2 hdc in first st, hdc next, 2 hdc in last st. (5)
Row 10: Ch 1, turn, 2 hdc in first st, hdc next 3, 2 hdc in last st. (7)
Row 11 & 12: Ch 1, turn, hdc each st across.
Switch to tan,
Row 13: Ch 1, turn, hdc2tog over first 2 sts, hdc next 3, hdc2tog over last 2 sts. (5)
Row 14: Ch 1, turn, hdc2tog over first 2 sts, hdc next, hdc2tog over last 2 sts. (3)
Row 15: Ch 1, turn, hdc2tog over first 2 sts, hdc next. (2)
Row 16: Ch 1, turn, hdc2tog over 2 sts. (1)
Row 17: Ch 1, turn, sl st in only st. (1)
Fasten off.
Using grey yarn, surface crochet across the first row of mustard, turn and surface crochet one more time across same row, this should create two rows of surface crochet.
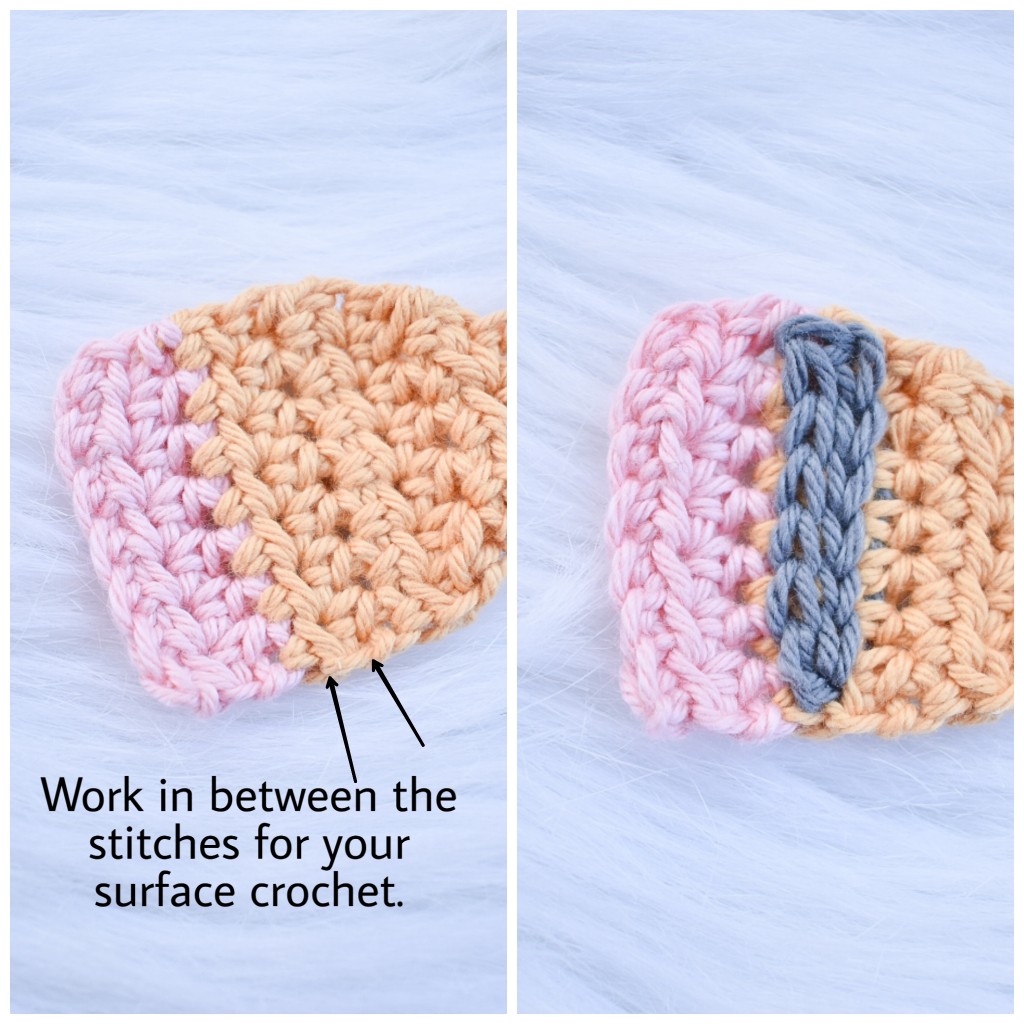
With black yarn and a needle create a triangle using the last sl st to go into and create the point and then back into the top of row 15’s stitches to make the wider side of the “lead”.
Weave in all ends.

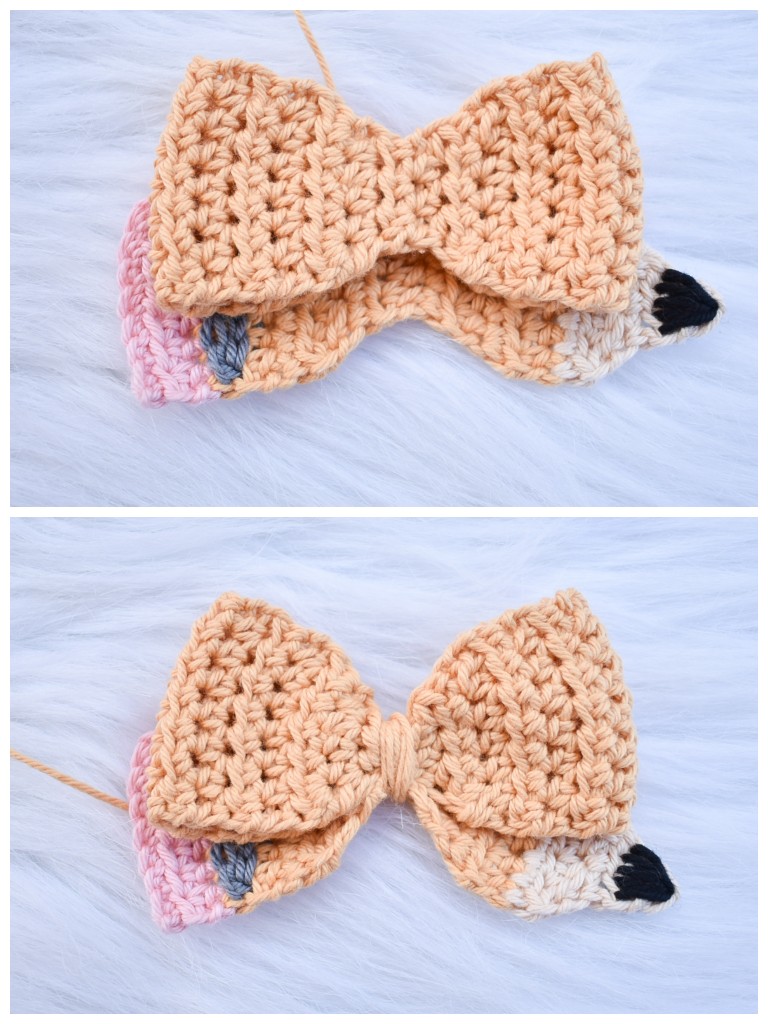
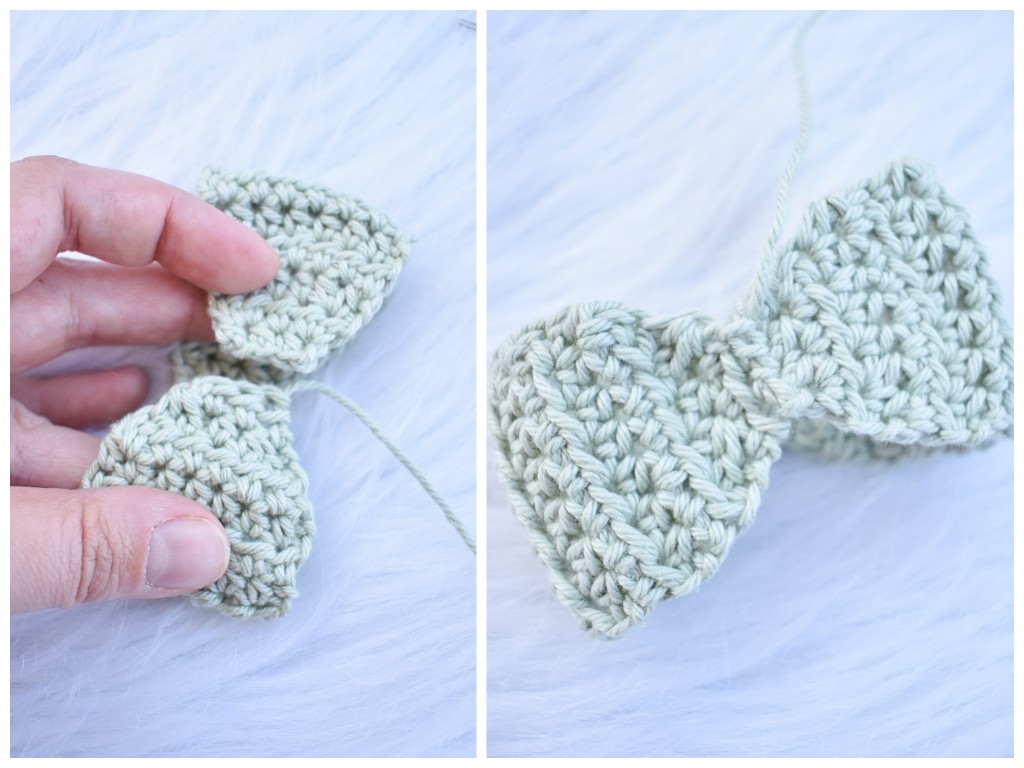
Line up the stitches of first and last row of the top half of the bow and sew together.

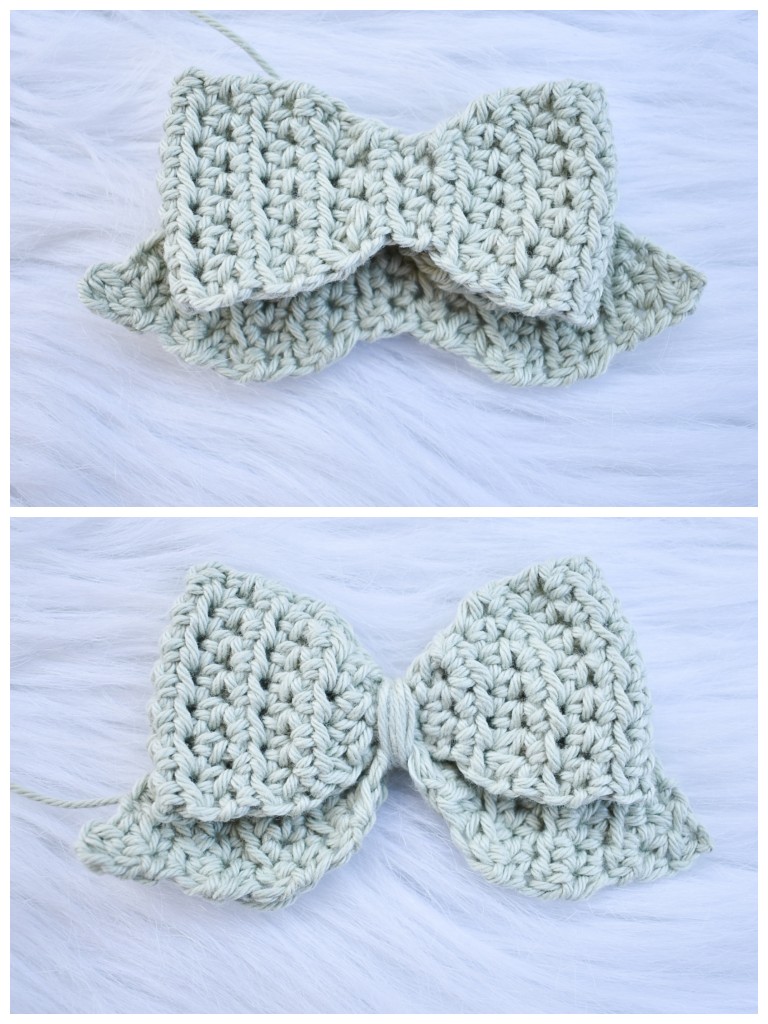
Lay the top half of the bow over the bottom half layering about half way over it. Using the long tail from the top half wrap it tightly around the middle about a half dozen times. The tighter you wrap your middle the better bow shape you’ll get.
If you will be adding a nylon head band you will want to also wrap around that at the same time.
If you are adding a clip you can just push the top half of the clip underneath the wrap after doing it.
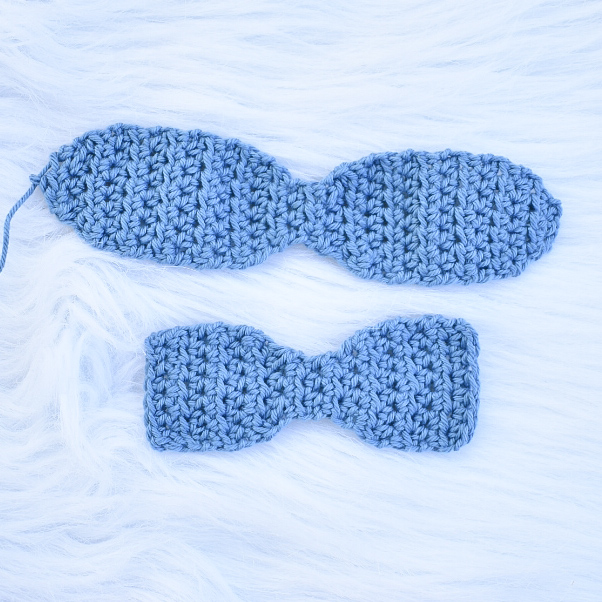
Square Tailed Bow
Top Half of Bow:
Ch 4.
Row 1: 2 hdc in 2nd ch from hook, hdc next, hdc in last ch. (5)
Row 2: Ch 1, turn, 2 hdc in first st, hdc next 3, 2 hdc in last st. (7)
Row 3-10: Ch 1, turn, hdc in each st across. (7)
Row 11: Ch 1, turn, hdc2tog over first 2 sts, hdc next 3, hdc2tog over last 2 sts. (5)
Row 12: Ch 1, turn, hdc2tog over first 2 sts, hdc next, hdc2tog over last 2 sts. (3)
Row 13: Ch 1, turn, hdc each st across. (3)
Row 14: Ch 1, turn, 2 hdc in first st, hdc next, 2 hdc in last st. (5)
Row 15: Ch 1, turn, 2 hdc in first st, hdc next 3, 2 hdc in last st. (7)
Row 16-23: Ch 1, turn, hdc in each st across. (7)
Row 24: Ch 1, turn, hdc2tog over first 2 sts, hdc next 3, hdc2tog over last 2 sts. (5)
Row 25: Ch 1, turn, hdc2tog over first 2 sts, hdc next, hdc2tog over last 2 sts. (3)
Fasten off, leaving a long tail for sewing and wrapping the middle.
Bottom Half:
Ch 8.
Row 1: Hdc in 2nd ch from hook and each ch across. (7)
Row 2: Ch 1, turn, hdc each st across. (7)
Row 3-5: Ch 1, turn, hdc each st across. (7)
Row 6: Ch 1, turn, hdc2tog over first 2 sts, hdc next 3, hdc2tog over last 2 sts. (5)
Row 7: Ch 1, turn, hdc2tog over first 2 sts, hdc next, hdc2tog over last 2 sts. (3)
Row 8: Ch 1, turn, hdc in each st across. (3)
Row 9: Ch 1, turn, 2 hdc in first st, hdc next, 2 hdc in last st. (5)
Row 10: Ch 1, turn, 2 hdc in first st, hdc next 3, 2 hdc in last st. (7)
Row 11-15: Ch 1, turn, hdc each st across.
Fasten off. Weave in all tails.
Line up the stitches of first and last row of the top half of the bow and sew together.
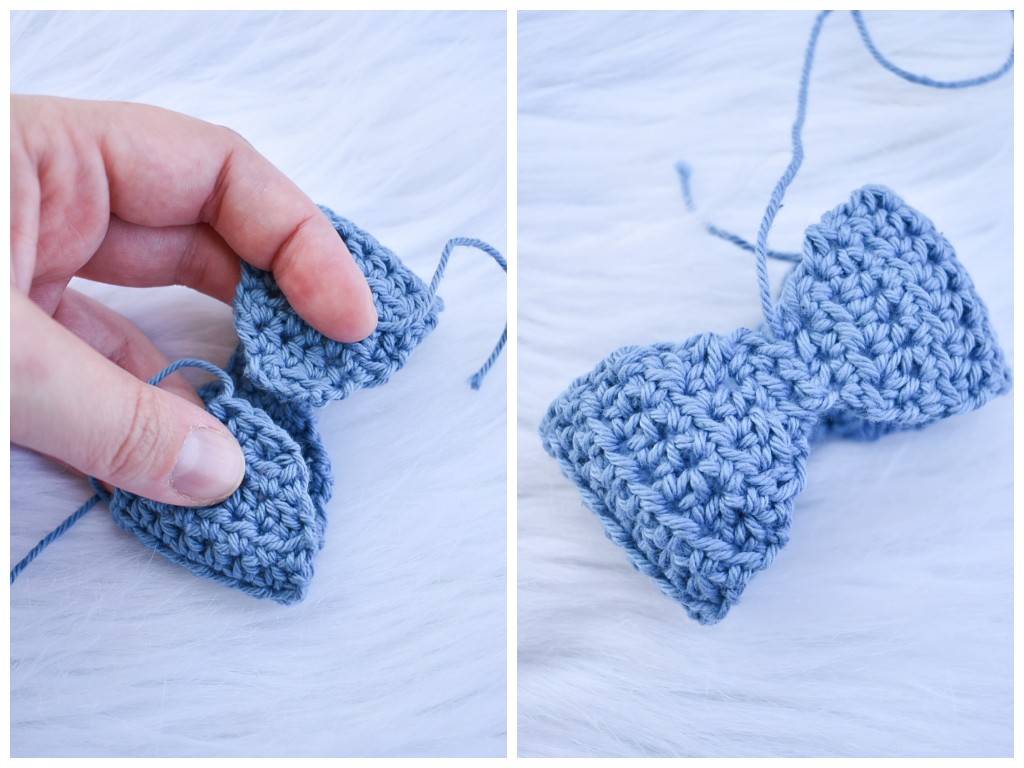
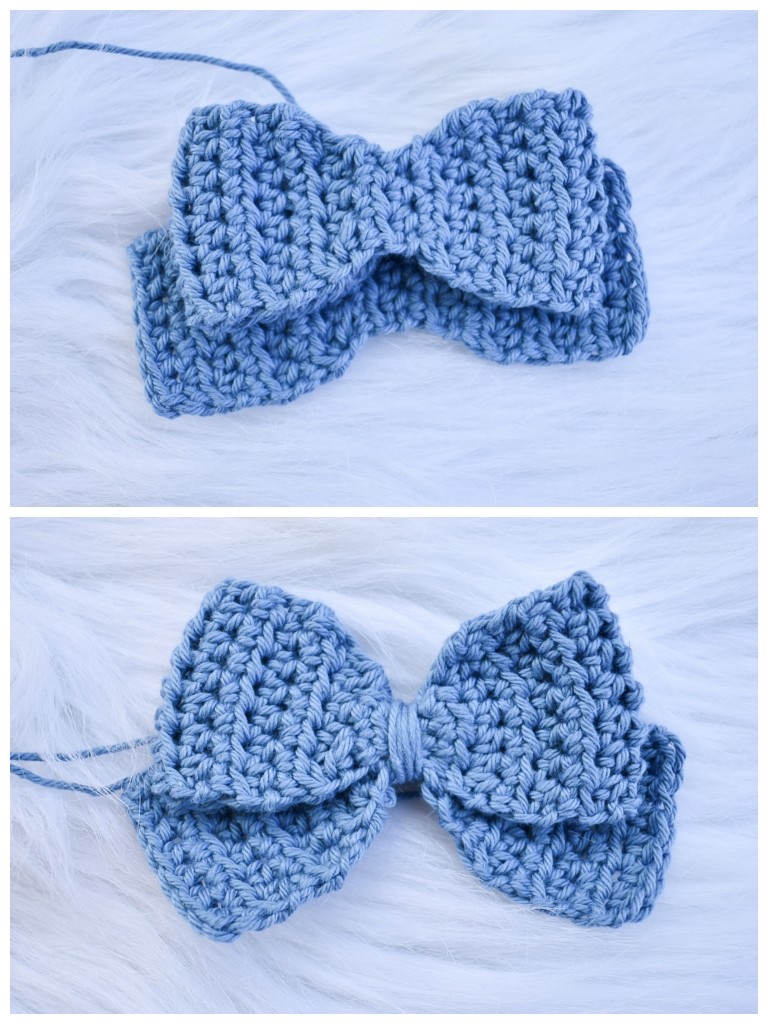
Lay the top half of the bow over the bottom half layering about half way over it. Using the long tail you left on the top half wrap it tightly around the middle about a half dozen times. The tighter you wrap your middle the better bow shape you’ll get.
If you will be adding a nylon head band you will want to also wrap around that at the same time.
If you are adding a clip you can just push the top half of the clip underneath the wrap after doing it.
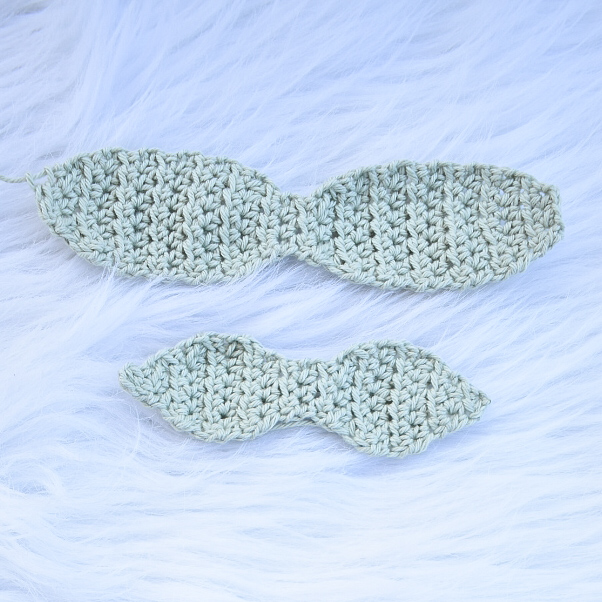
Triangle Tailed Bow
Top Half of Bow:
Ch 4.
Row 1: 2 hdc in 2nd ch from hook, hdc next, 2 hdc in last ch. (5)
Row 2: Ch 1, turn, 2 hdc in first st, hdc next 3, 2 hdc in last st. (7)
Row 3-10: Ch 1, turn, hdc in each st across. (7)
Row 11: Ch 1, turn, hdc2tog over first 2 sts, hdc next 3, hdc2tog over last 2 sts. (5)
Row 12: Ch 1, turn, hdc2tog over first 2 sts, hdc next, hdc2tog over last 2 sts. (3)
Row 13: Ch 1, turn, hdc each st across. (3)
Row 14: Ch 1, turn, 2 hdc in first st, hdc next, 2 hdc in last st. (5)
Row 15: Ch 1, turn, 2 hdc in first st, hdc next 3, 2 hdc in last st. (7)
Row 16-23: Ch 1, turn, hdc in each st across. (7)
Row 24: Ch 1, turn, hdc2tog over first 2 sts, hdc next 3, hdc2tog over last 2 sts. (5)
Row 25: Ch 1, turn, hdc2tog over first 2 sts, hdc next, hdc2tog over last 2 sts. (3)
Fasten off, leaving a long tail for sewing and wrapping the middle.
Bottom Half:
Ch 2.
Row 1: 2 hdc in 2nd ch from hook. (2)
Row 2: Ch 1, turn, 2 hdc in first st, hdc last. (3)
Row 3: Ch 1, turn, 2 hdc in first st, hdc next, 2 hdc in last st. (5)
Row 4: Ch 1, turn, 2 hdc in first st, hdc next 3, 2hdc in last st. (7)
Row 5 & 6: Ch 1, turn, hdc each st across. (7)
Row 7: Ch 1, turn, hdc2tog over first 2 sts, hdc next 3, hdc2tog over last 2 sts. (5)
Row 8: Ch 1, turn, hdc2tog over first 2 sts, hdc next, hdc2tog over last 2 sts. (3)
Row 9: Ch 1, turn, hdc in each st across. (3)
Row 10: Ch 1, turn, 2 hdc in first st, hdc next, 2 hdc in last st. (5)
Row 11: Ch 1, turn, 2 hdc in first st, hdc next 3, 2 hdc in last st. (7)
Row 12 & 13: Ch 1, turn, hdc each st across.
Row 14: Ch 1, turn, hdc2tog over first 2 sts, hdc next 3, hdc2tog over last 2 sts. (5)
Row 15: Ch 1, turn, hdc2tog over first 2 sts, hdc next, hdc2tog over last 2 sts. (3)
Row 16: Ch 1, turn, hdc2tog over first 2 sts, hdc next. (2)
Row 17: Ch 1, turn, hdc2tog over 2 sts. (1)
Row 18: Ch 1, turn, sl st in only st. (1) Fasten off. Weave in all ends.
Line up the stitches of first and last row of the top half of the bow and sew together.
Lay the top half of the bow over the bottom half layering about half way over it. Using the long tail you left on the top half wrap it tightly around the middle about a half dozen times. The tighter you wrap your middle the better bow shape you’ll get.
If you will be adding a nylon head band you will want to also wrap around that at the same time.
If you are adding a clip you can just push the top half of the clip underneath the wrap after doing it.
I hope you enjoyed these patterns and that you will all get a ton of use out of them. Thank you so much for checking out my very first blog post and I hope to bring more free patterns soon! A pdf version of this pattern is available in my etsy shop along with my other more complex patterns. I would love for you to check it out!
Woodland Stitchcraft Etsy Shop
Back to School Pattern Roundup!
- Crayon Table Runner from Ekayg Degsigns
You have to check out this adorable crayon table runner and read about the tradition that Erin has with her kids each school year! I think it sounds like an amazing idea and so much fun. This table runner could totally work for a teacher gift too! PS- She also has a pencil version! TOO CUTE!

Click here to see the Crayon Table Runner Pattern.
If you want to give Erin a follow on social media you can check her out on Instagram, here.
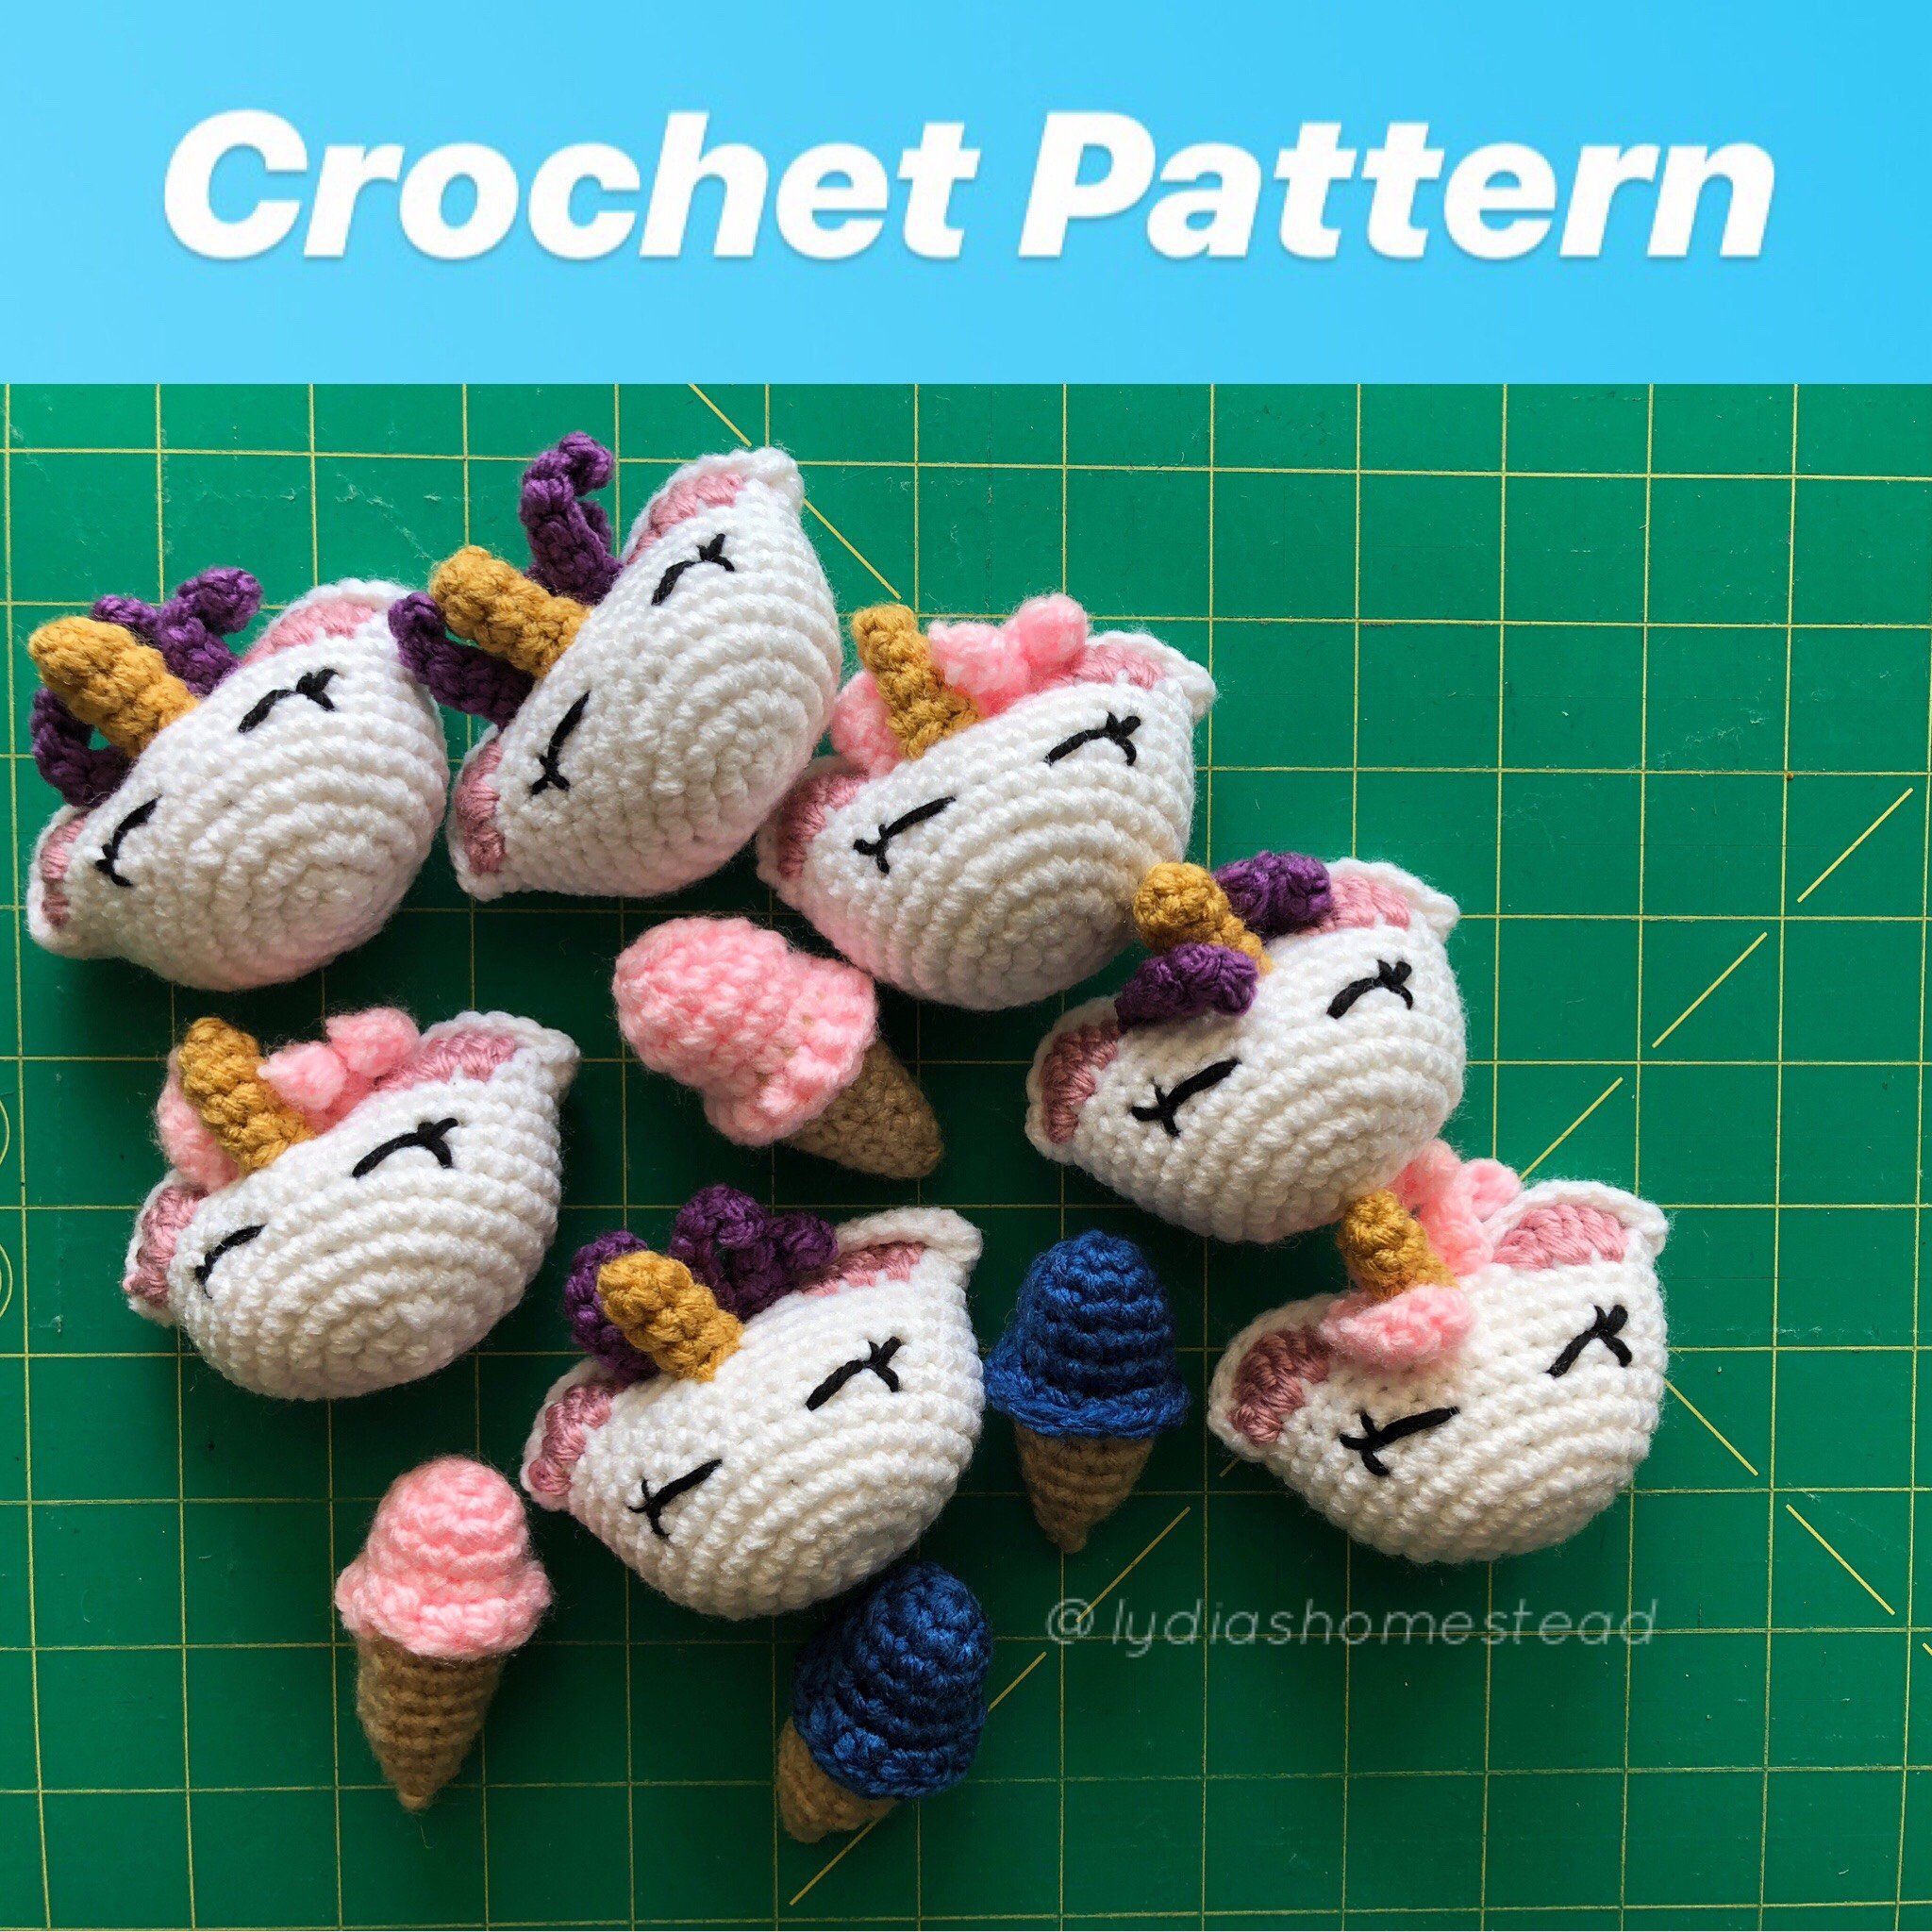
2. Unicorn Keychain from Lydia’s Homestead
Next up is a fun little pattern that is perfect for a first day of school gift that any kid would love to dress their backpack up with! These unicorn keychains can help them keep track of their backpack and they have a little reminder of home with them as they face down a new school year! You should also check out her mermaid bookmarks!
Click here to buy the pattern on Etsy or here to buy it Ravelry.
If you want to give Lydia a follow on social media you can check out her Instagram, here.
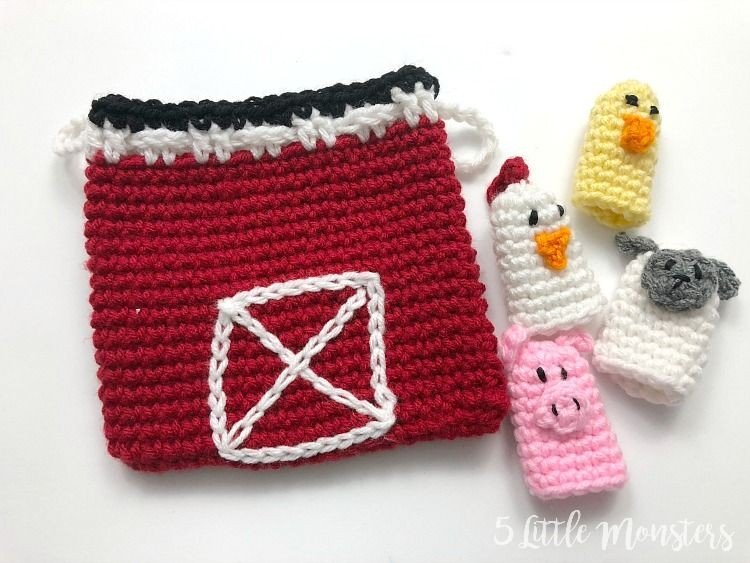
3. Farmhouse Puppet Playset from 5 Little Monsters
Got a little brother or sister who isn’t going to school yet but wants to learn and be a part of the new school year too? This little playset would be a great way to give them something new to distract them from not getting to go to school and encourage creative play while maybe working on those animal sounds! Erica also has TONS of adorable pencil case patterns on her blog that you should definitely check out too!
Click here to see the Farmhouse Puppet Playset Pattern.
If you want to give Erica a follow on social media you can check her out on Instagram, here.
4. Modern Zipper Pouch by Stefs Serenity Crochet
Have an older child in mind? Maybe YOU are taking some classes and need something for yourself? These pouches are perfect for a fashionable and functional back to school project. You could use these for so many things and the modern design is so beautiful that you might as well just make them on repeat! What color combos will you go for?

Click here to purchase the pattern from her Ravelry Store.
If you want to give Stefanie a follow on social media you can check her out on Instagram, here.


